Customise Lilly's Prompts
This section guides you through the process of customizing Lilly's prompt in your chatbot application. By accessing the prompt configuration file and making modifications as needed, you can personalize Lilly's responses to align with your project's tone, style, and specific requirements. With this level of customization, you can enhance user engagement and create a more tailored conversational experience within your application.
Step 1: Navigate to the Constants File
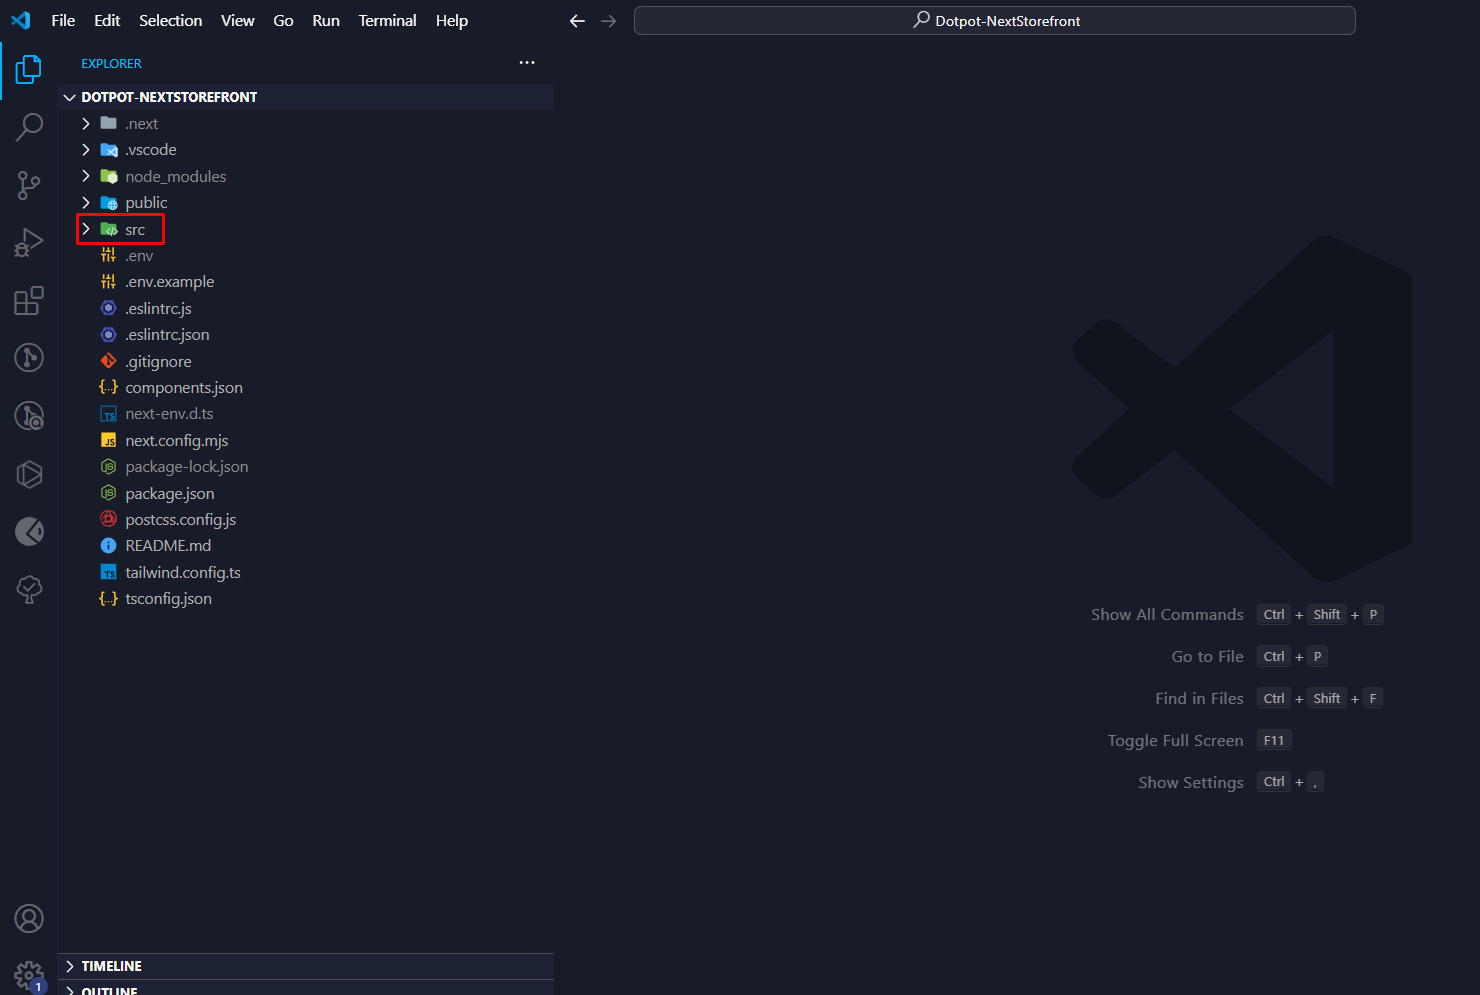
In Visual Studio Code (VSCode), locate the source code directory (src) of your project.
Step 2: Access the Chatbot Constants
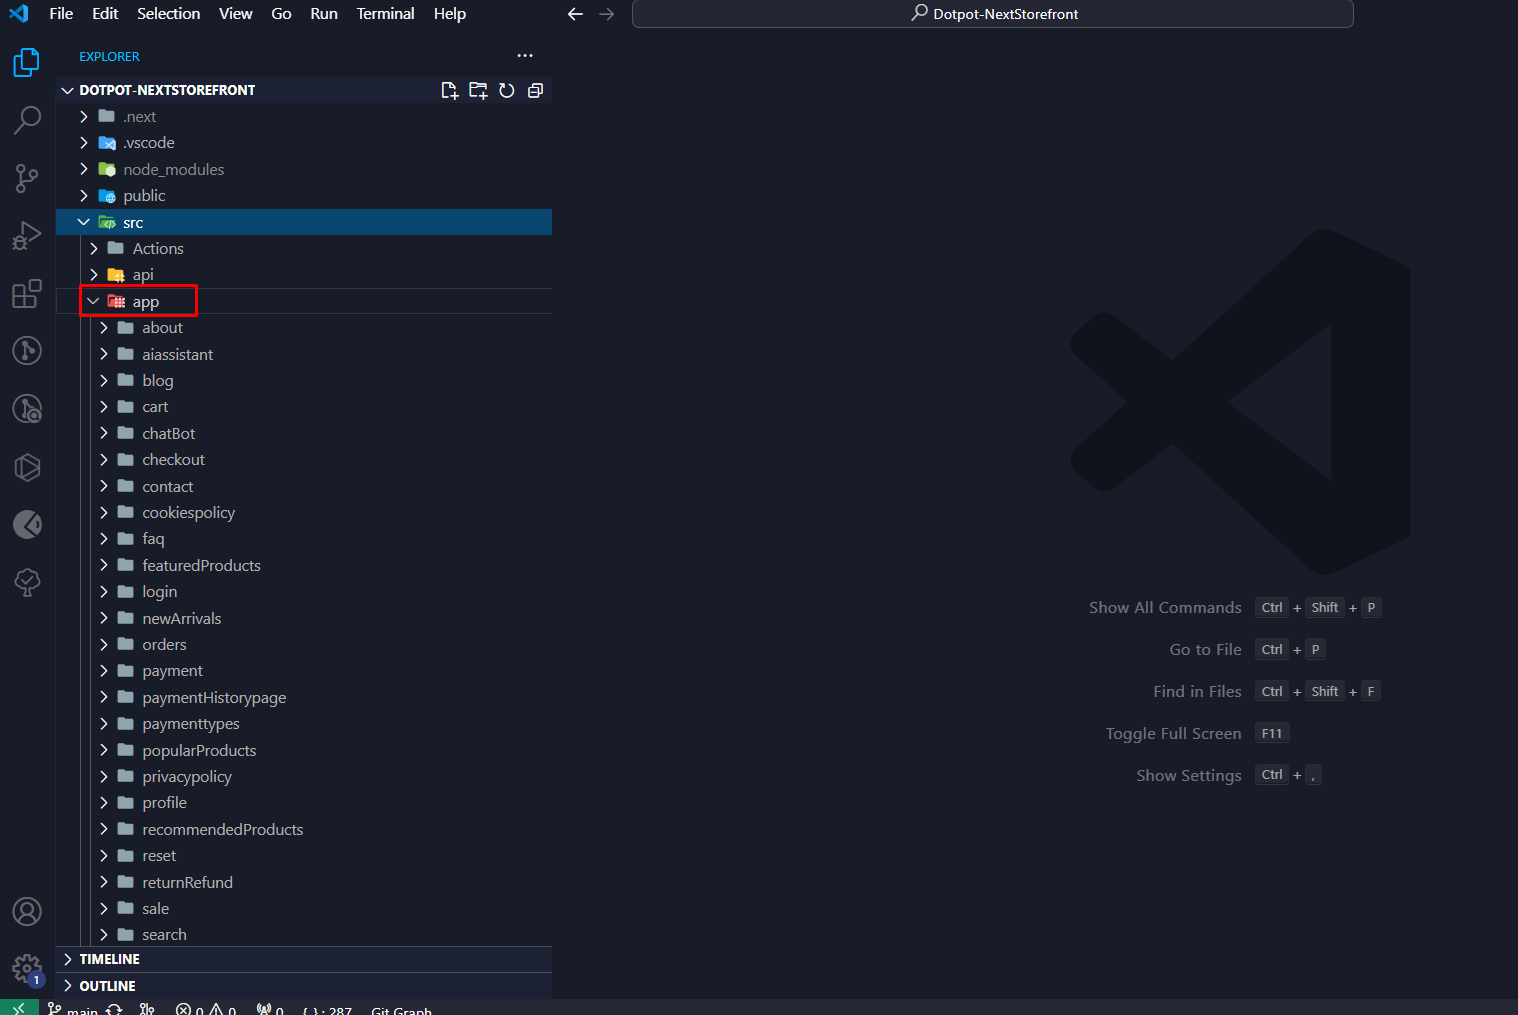
Within the src directory, navigate to the app folder.
Step 3: Open the Chatbot Constants File
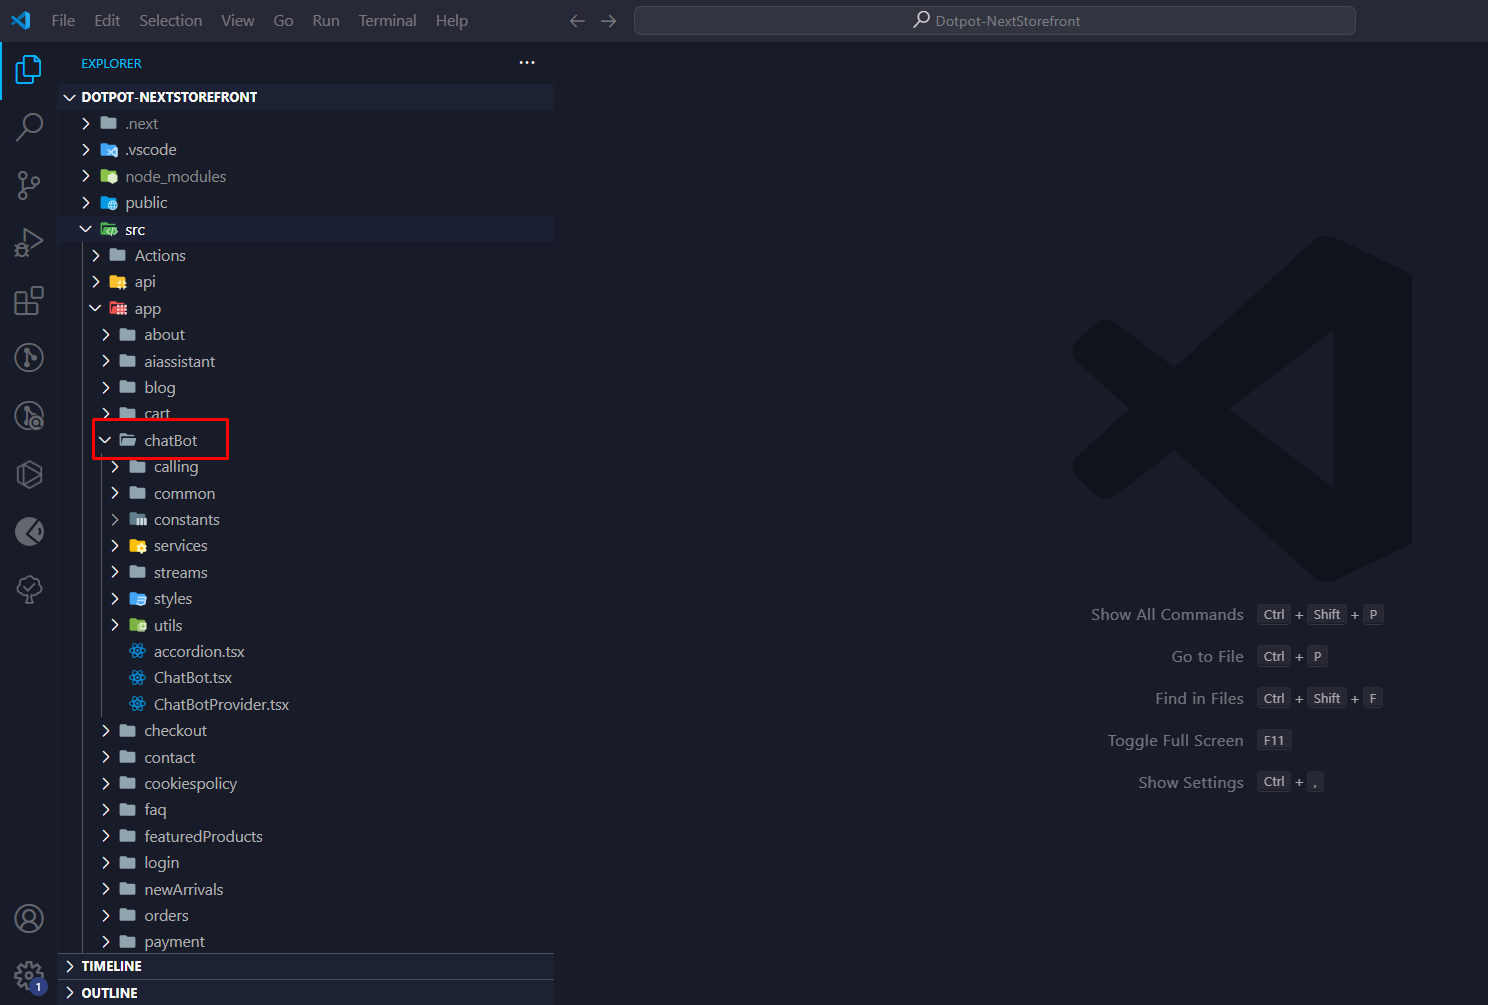
Inside the app folder, find the chatbot directory. Open this directory.
Step 4: Locate the Prompt Configuration File
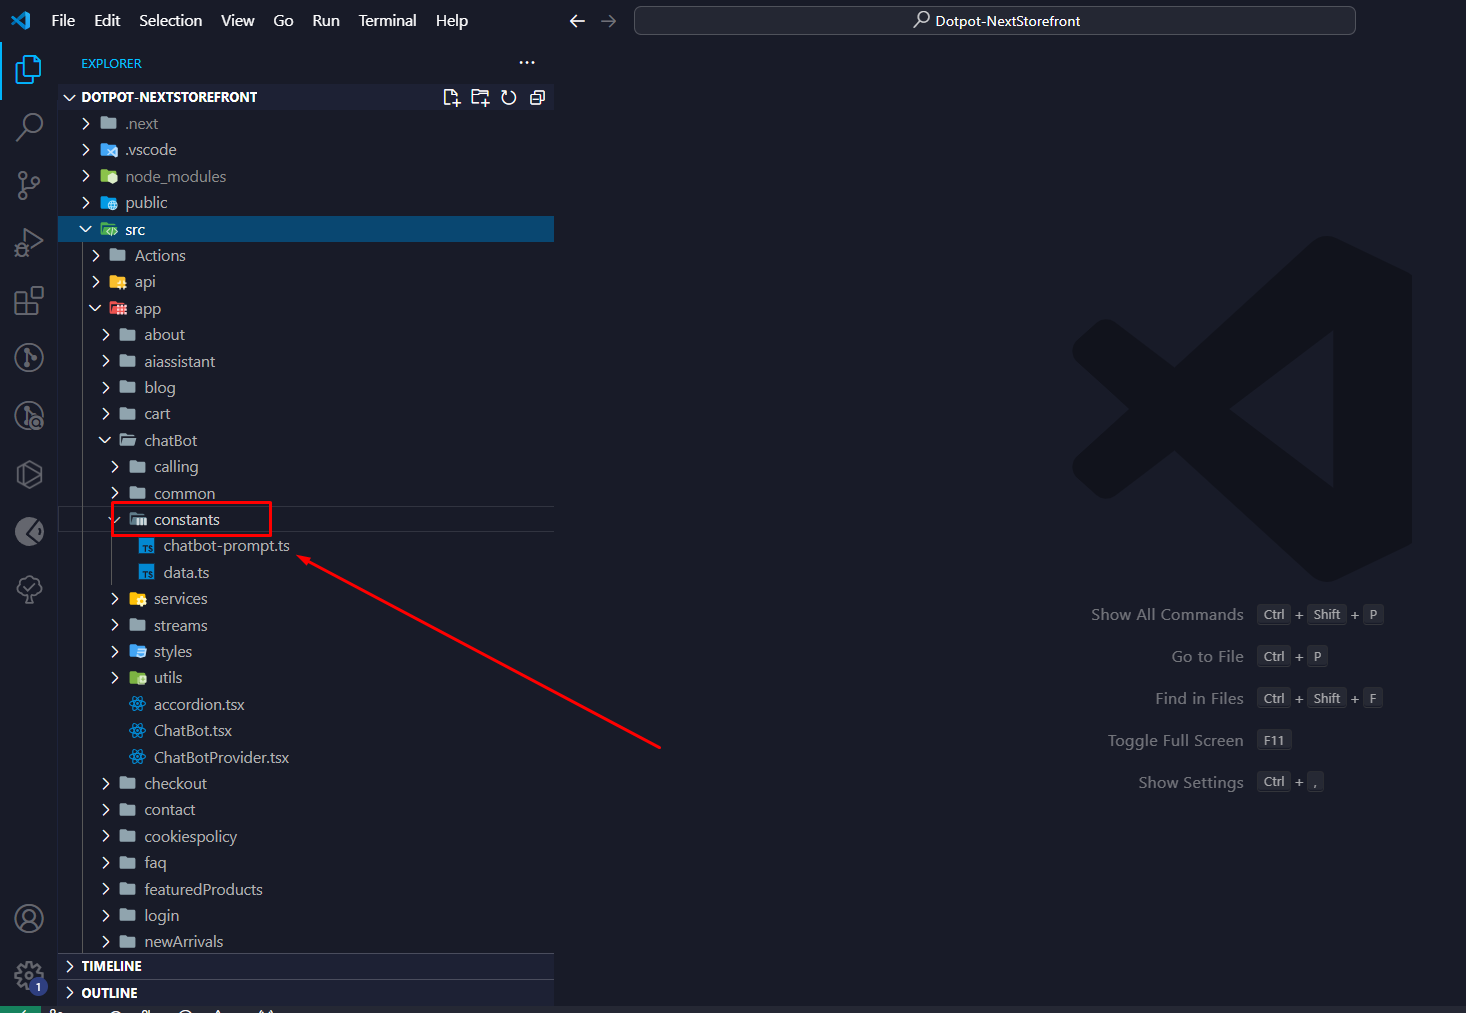
Within the chatbot directory, find the constants subdirectory. Open this directory.
Step 5: Edit the Prompt Configuration
Locate the chatbot-prompt.ts file within the constants directory. Open this file.
Step 6: Customize Your Prompt
In the chatbot-prompt.ts file, you will find the existing prompt configuration. Modify the prompt text as desired to customize Lilly's responses according to your requirements.
Step 7: Save Changes
After customizing the prompt, save the changes to the chatbot-prompt.ts file.
By following these steps, you can easily customize Lilly's prompt to tailor her responses to match your application's needs.